OpenAR 2.0
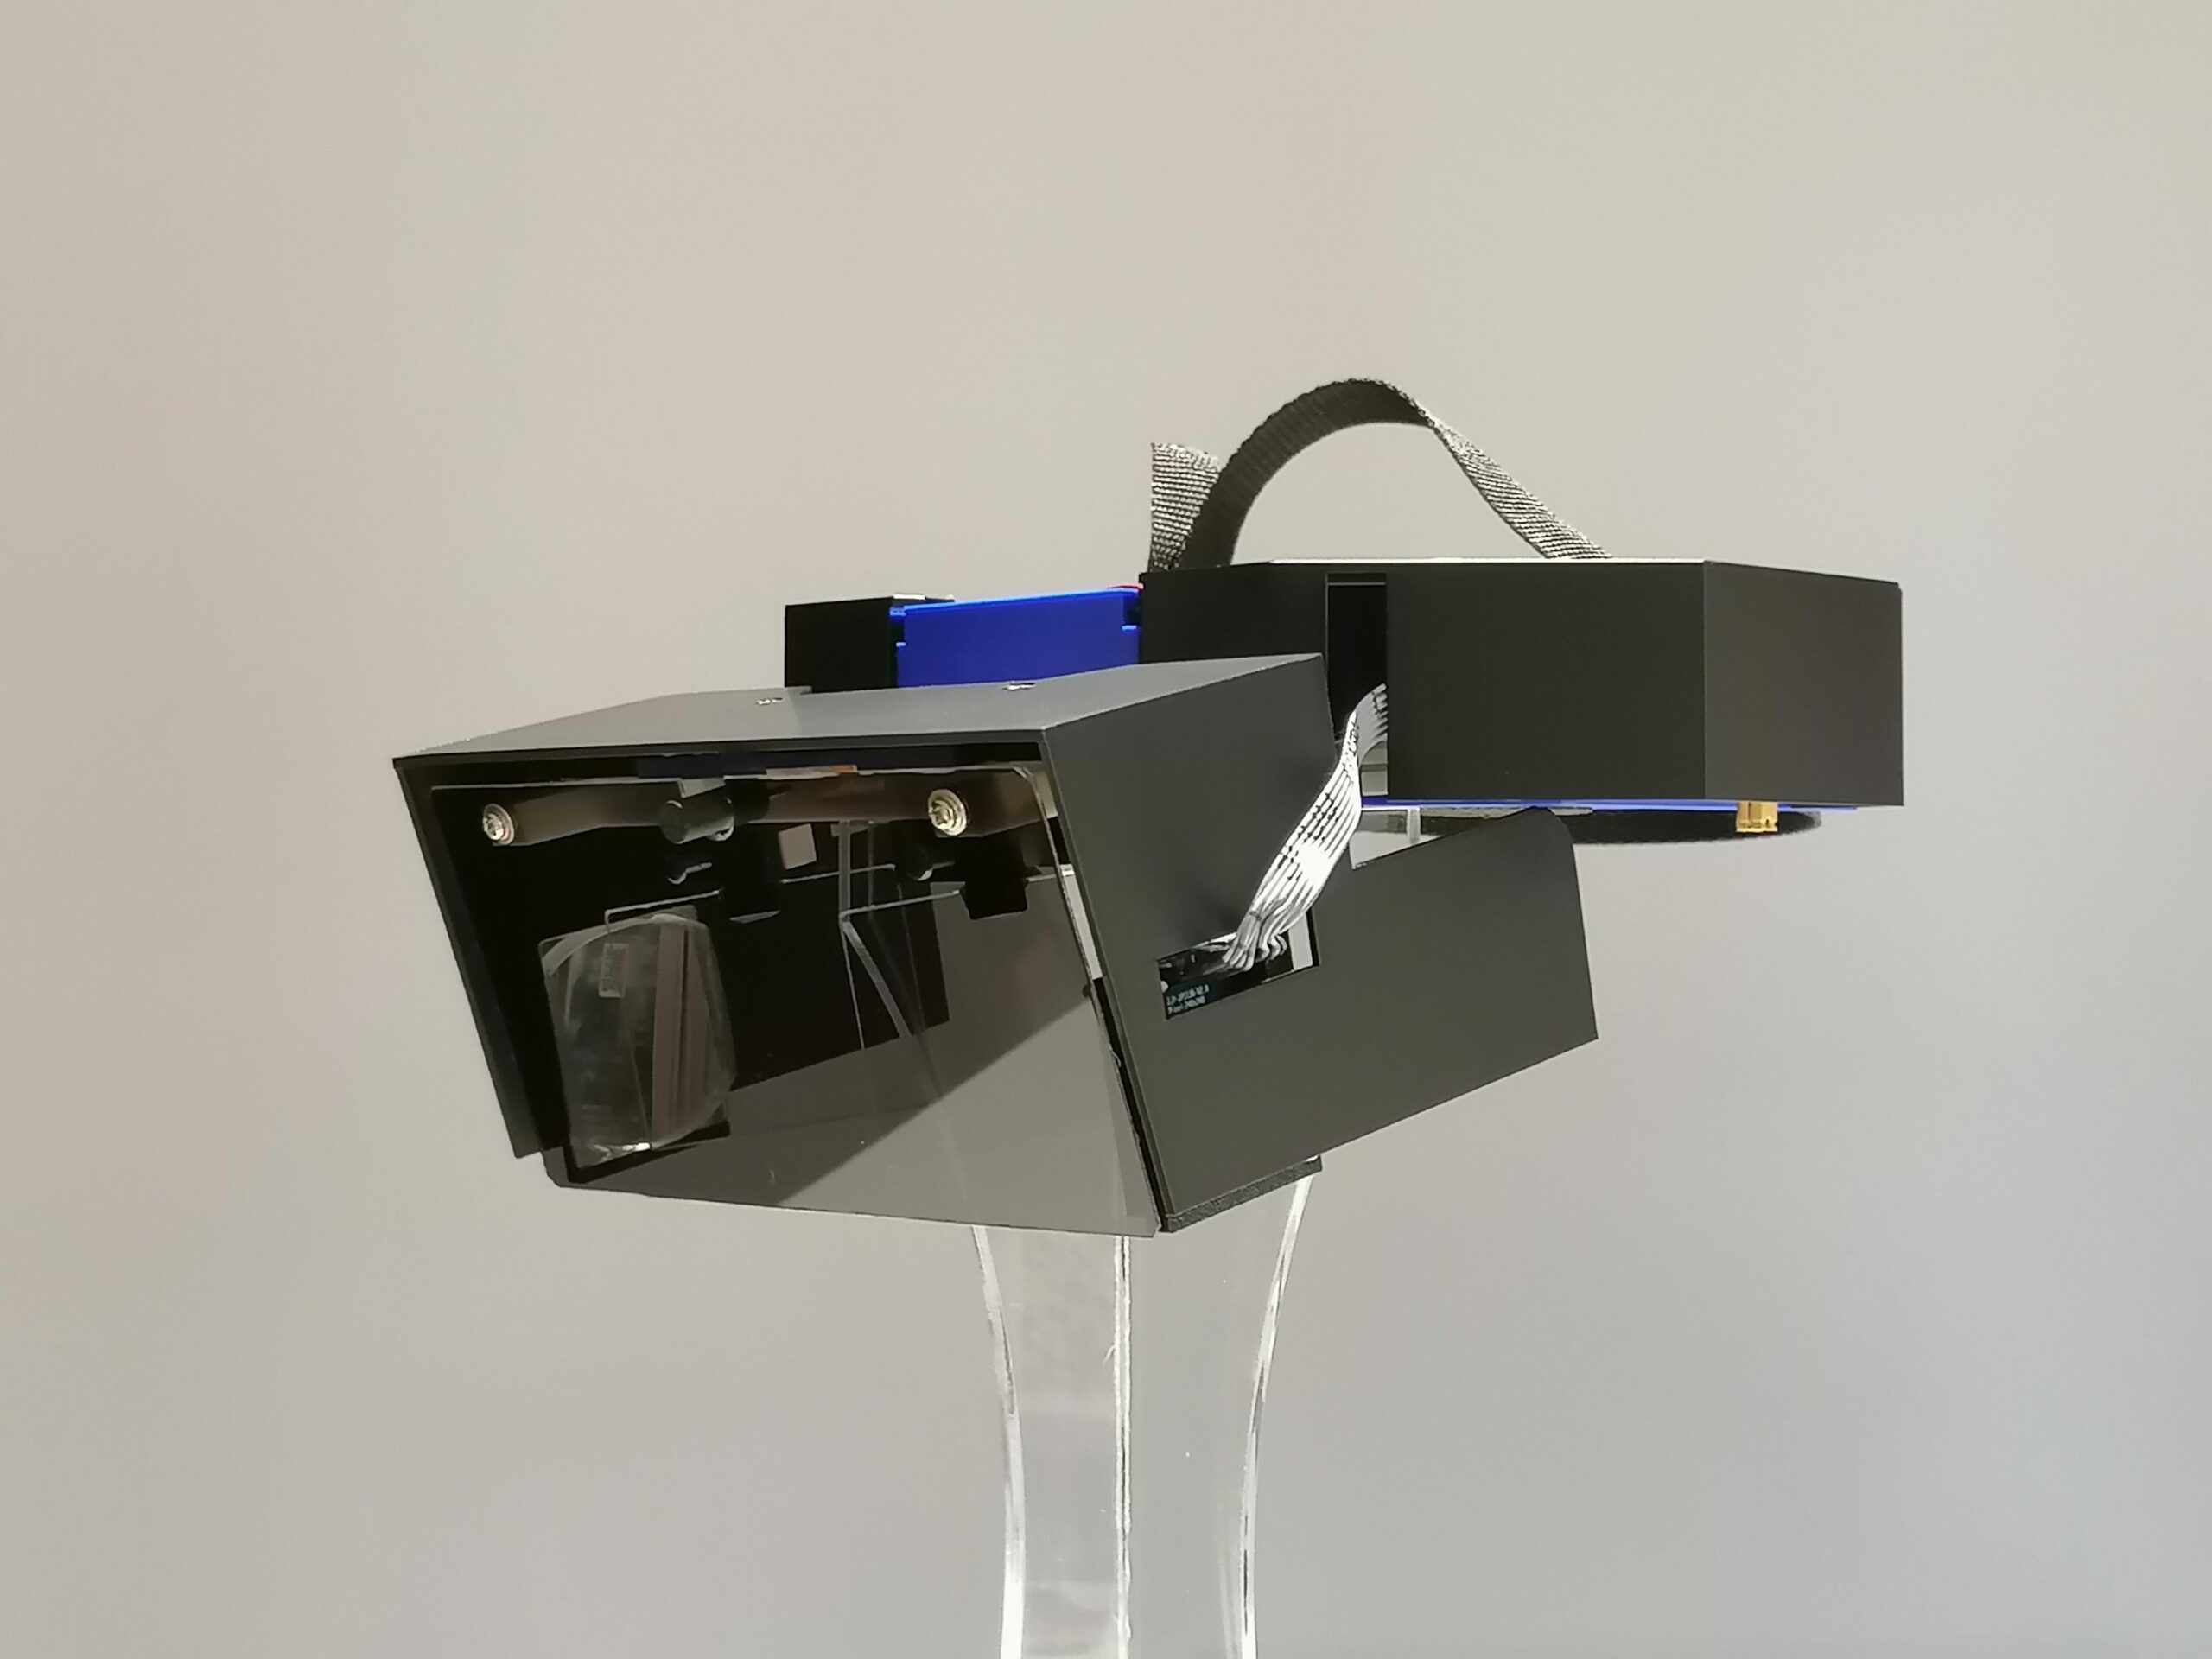
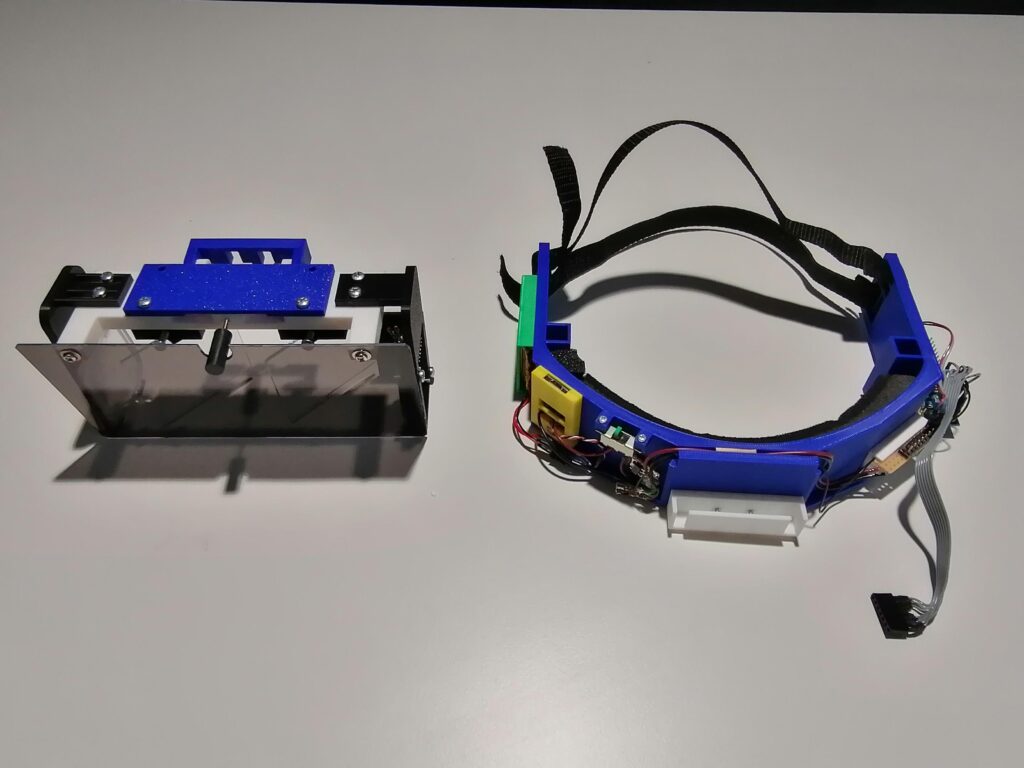
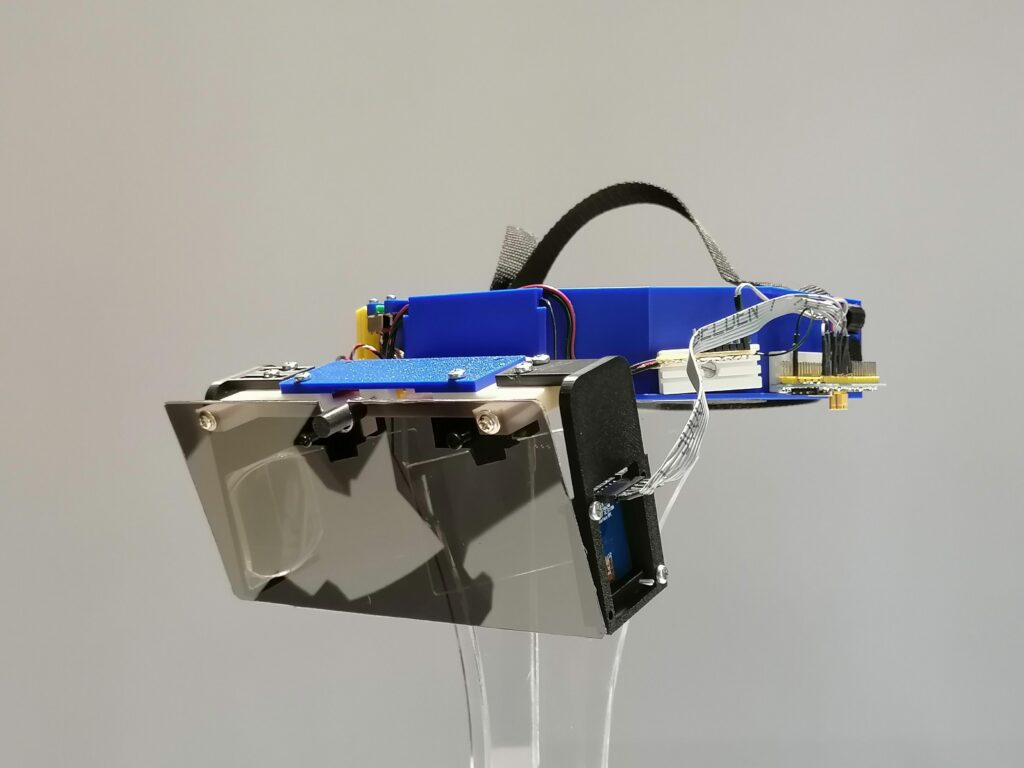
OpenAR is back! It has been a long time, but we are finally ready to announce the next iteration of our inexpensive augmented reality glasses: OpenAR 2.0! This version rocks all new – hobbyist friendly – 3D-printed parts. You only need access to a 3D-printer and some PLA filament (a measly 6.25 € worth of said filament) to make the parts yourself. The 3D-printed parts are not the only inexpensive feature of OpenAR 2.0: the whole thing requires around 30-50 € worth of components! Majority of the costs come from the electronics and the prices can vary depending on where you buy them. The optical setup (display, reflective glasses, lens and mirror) also had a makeover: OpenAR 2.0 features a smaller, more compact frame and a custom-made 3D-printed headband the optical setup connects to.
OpenAR 2.0 also features more modularity. You happen to have an LCD display laying around that is not the same as the one we used? No problem! You only need to do slight modifications to the 3D model that works as an adapter for the display. Do you have a different STM32 developer board model than we do? The code we provide will most likely work on it as well. The point stands: you don’t need to have all the exact same components – electrical or otherwise – to build your own OpenAR 2.0 augmented reality glasses.
The comprehensive documentation (linked at the bottom of the page) guides you on how the optics work, what is needed to build the glasses, and the step-by-step process to assemble them. You can find all the .f3d files for the 3D models and the print ready .stl and .3mf files of the 3D models in the documentation.
How it works
The optical setup is not too different from OpenAR 1.0. We still reflect light from an LCD or OLED display with two reflective glass plates (one for each eye), but the setup is much more compact and hobbyist friendly.
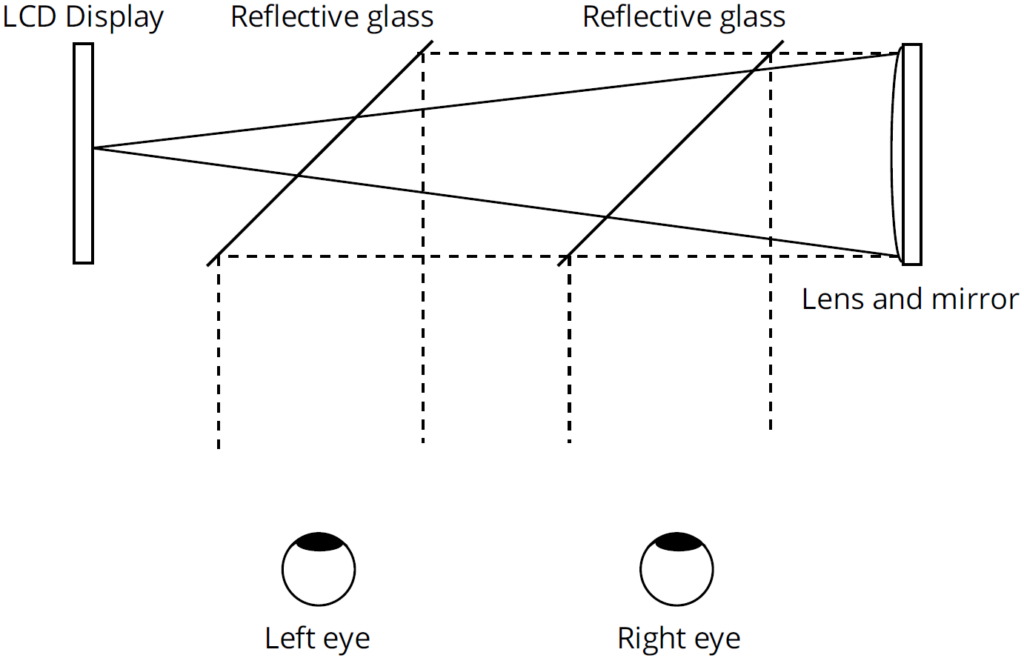
- The LCD display we use is a 240×240 1.3-inch LCD display.
- The two reflective glasses are cut from a thin large plate of clear glass (possibly flint glass) using a glass cutting tool.
- The lens is a +3.5-diopter lens taken from a pair of reading glasses that were bought from our local hardware store.
- The mirror is cut from a rectangular makeup mirror that also was bought from our local hardware store.
And that is pretty much the whole optical setup. Next, we need the rest of the electronics to run the LCD display.
- The developer board (CPU) is a STM32 Blue Pill which is programmed using a ST-LINK V2 Programmer. Blue Pill doesn’t have a voltage regulator built into it, so we had to make one ourselves. It requires a couple of capacitors and a 3V3 LDO Voltage Regulator. More information and the complete circuit diagram can be found in the OpenAR 2.0 documentation.
- The battery is a rechargeable 3.7 V 1500 mAh LiPo battery with an integrated Protection Circuit Module (PCM) bought from a hardware store. A micro-USB charger board is also needed to charge the LiPo battery.
And that’s pretty much it! The rest of the OpenAR 2.0 parts are 3D-printed (except for one small spring that I borrowed from an office pen) and bolted together with M2 and M3 bolts. In the OpenAR 2.0 documentation, you can find a step-by-step guide on how to build our augmented reality -glasses. The documentation also includes a demo program we made for the glasses and the instructions on how to program the STM32 Blue Pill to run the demo program on the LCD display.
Downloads
You can download the OpenAR 2.0 documentation and files here.
Licenses
OpenAR 3D model files provided in this documentation are under the following license:
OpenAR © 2025 by University of Eastern Finland is licensed under CC BY-NC 4.0. To view a copy of this license, visit https://creativecommons.org/licenses/by-nc/4.0/
The OpenAR demo programs provided in this documentation are licensed under the Apache License, Version 2.0:
Copyright 2025 University of Eastern Finland
Licensed under the Apache License, Version 2.0 (the “License”); you may not use this file except in compliance with the License. You may obtain a copy of the License at http://www.apache.org/licenses/LICENSE-2.0
Unless required by applicable law or agreed to in writing, software distributed under the License is distributed on an “AS IS” BASIS, WITHOUT WARRANTIES OR CONDITIONS OF ANY KIND, either express or implied. See the License for the specific language governing permissions and limitations under the License.